Insect photography is a fascinating and rewarding genre that allows photographers to explore the intricate details of nature. Capturing the beauty and uniqueness of insects requires a combination of skill, patience, and the right equipment. Unlike other types of photography, insect photography demands a specific approach, as these tiny creatures are often fast-moving and difficult to capture.
Whether you’re a beginner or an experienced photographer, learning how to photograph insects can be both challenging and exhilarating. From selecting the right camera settings to understanding the behavior of insects, there are several key factors to consider for stunning results. This guide will walk you through the steps necessary to capture beautiful insect photos, ensuring you get the best shot every time.
Understanding the Basics of Insect Photography
Insect photography requires a good understanding of the creatures you’re photographing. Observing an insect’s movements and behavior is essential in predicting where they will go next. Patience is key when shooting insects, as they can be skittish and may not stay in one place for long.
Choosing the right gear is also crucial. A macro lens is ideal for capturing close-up images of insects, as it allows you to focus on tiny details. Additionally, a sturdy tripod will help you maintain a steady shot, especially when photographing small subjects at close range.
Finally, it’s important to understand the lighting. Insects are often active in various environments, and natural light plays a significant role in capturing their true colors and textures. Artificial lighting may be necessary in low-light situations, but it should be used sparingly to avoid overwhelming the subject.
Choosing the Right Camera Gear
The first step in photographing insects is selecting the right camera and lens. A DSLR or mirrorless camera with manual settings is ideal, as it gives you full control over exposure, focus, and shutter speed. The camera should also be equipped with a high-resolution sensor to capture intricate details.
For insect photography, a macro lens is essential. These lenses are designed to capture subjects at a very close range while maintaining sharp focus. The longer the focal length of the lens, the more you can distance yourself from the insect while still maintaining excellent detail.
A tripod is another important piece of equipment. A stable tripod prevents camera shake, especially when shooting with slow shutter speeds. Additionally, a flash or external light source may be necessary to illuminate insects when shooting in low-light conditions.
Mastering Camera Settings for Insect Photography
When photographing insects, your camera settings will play a crucial role in determining the outcome of your photos. The aperture setting is one of the most important settings to adjust. A smaller aperture (higher f-stop number) increases the depth of field, ensuring both the insect and its environment are in focus.
Shutter speed is also vital in capturing sharp, clear images. A fast shutter speed will freeze the motion of an insect, allowing you to capture crisp details. For insects that move quickly, try using a shutter speed of 1/500s or faster.
Another key setting is the ISO. Keeping the ISO as low as possible will ensure minimal noise in your photos. However, if you need more light for your shot, you may need to increase the ISO. Finding the right balance between aperture, shutter speed, and ISO is essential for a well-exposed image.
Composing Your Insect Photograph
Composition is one of the most crucial elements in photography. To create visually striking insect photos, you need to carefully consider how the insect fits within the frame. Using the rule of thirds is a simple yet effective technique to position your subject within the composition.
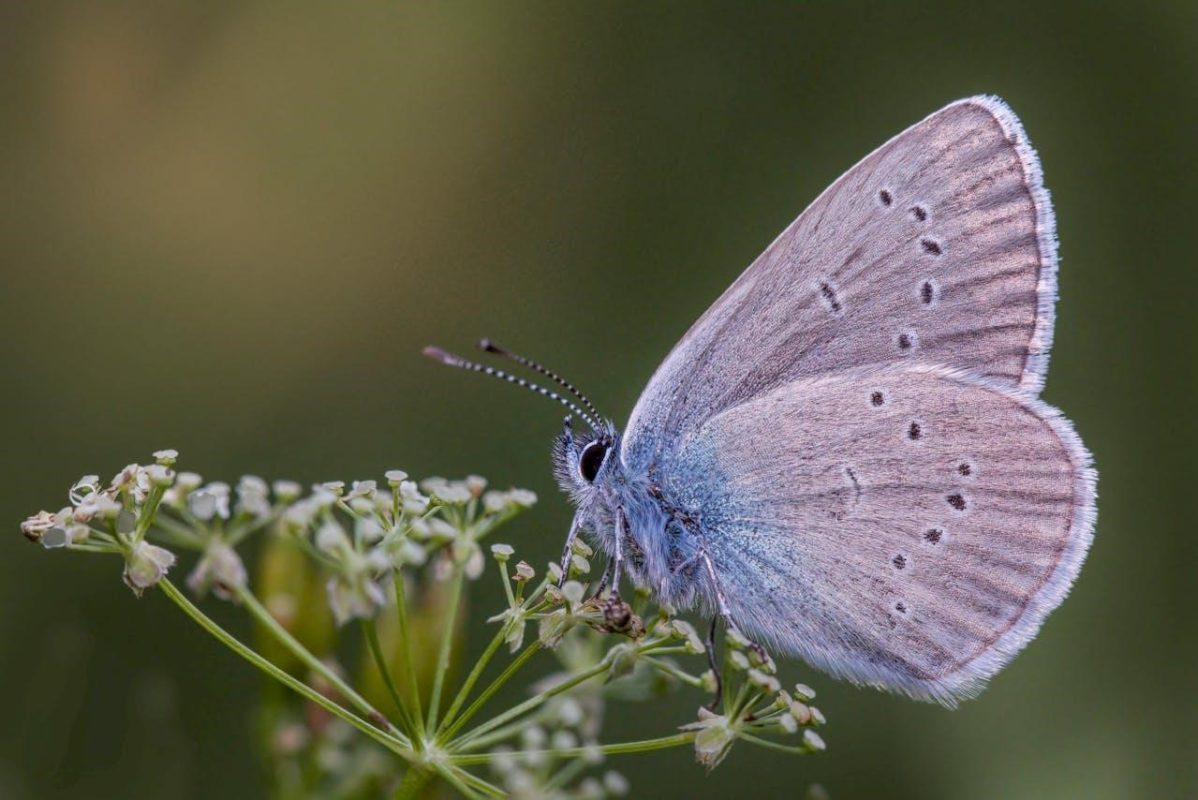
Focus on highlighting the insect’s unique features, such as its wings, antennae, or eyes. A close-up shot will reveal intricate details that are often overlooked by the naked eye. However, consider including some of the surrounding environment in the shot to give context to the insect’s habitat.
Be mindful of the background as well. A cluttered background can distract from the subject. Try to find a simple, unobtrusive background that complements the insect’s colors and form.
Capturing the Right Light for Insect Photography
Lighting is one of the most challenging aspects of insect photography. Natural light, such as sunlight, is often ideal for capturing vibrant and realistic images of insects. Early mornings or late afternoons, when the light is softer, are perfect times for insect photography.
If you’re shooting in bright sunlight, consider using diffusers to soften the light and prevent harsh shadows. Alternatively, you can use reflectors to bounce light back onto the insect, ensuring the details are well-lit.
In situations where natural light is insufficient, using artificial lighting like a flash or ring light may be necessary. However, it’s important to be cautious when using artificial light, as it can startle the insect or create unnatural highlights.
Dealing with Movement and Patience
Insects are notoriously fast and unpredictable. Capturing a sharp image requires patience and quick reflexes. A good way to work with insect movement is to use continuous autofocus mode, which helps keep the insect in focus as it moves.
You can also try to anticipate the insect’s next move by studying its behavior. For example, if you notice that the insect is resting on a particular flower, it may stay in that spot for a few moments. This gives you an opportunity to take the shot before it flies away.
If you’re photographing a subject that is particularly skittish, consider approaching slowly and carefully. Sudden movements or loud noises can startle the insect, making it more difficult to get a good shot.
Post-Processing for Insect Photography
Once you’ve captured your insect photos, the next step is post-processing. Editing your images can enhance details, sharpen focus, and improve the overall aesthetic of the photo. Software like Adobe Lightroom or Photoshop can help adjust exposure, contrast, and color balance.
During post-processing, make sure not to over-edit the image. While enhancing colors and sharpness is important, it’s essential to maintain the natural beauty of the insect. Cropping the image can also help improve composition and remove distracting elements.
Additionally, be mindful of noise reduction when increasing the ISO. Noise can become noticeable in high-ISO images, so using a noise reduction tool can help maintain clarity.