The influencer flash photography look has become a trend in social media, known for its sharp, high-contrast images with vibrant, glowing highlights. Influencers and professional photographers alike use this style to create attention-grabbing shots that stand out on platforms like Instagram. Achieving this aesthetic requires a combination of lighting, positioning, and post-processing techniques to give your images a polished, dynamic feel.
Flash photography is often associated with harsh lighting, but when used creatively, it can produce stunning results. The key to achieving the influencer flash photography look is controlling the light and shadows in your shot. Whether you’re using a traditional flash or a more sophisticated lighting setup, it’s crucial to understand how to manipulate it effectively.
This guide will explore essential tips and techniques for mastering the influencer flash photography look. From setting up your equipment to editing your photos, we’ll cover everything you need to know to make your shots as impactful as those seen online.
Understanding the Basics of Flash Photography
Flash photography can often appear too harsh, but when used properly, it creates crisp, vibrant images with minimal shadows. The secret to getting the influencer flash photography look is controlling the intensity of the flash, adjusting its angle, and combining it with natural or ambient light.
To get started, you’ll need a camera with manual settings, allowing you to control your exposure, aperture, and shutter speed. Once you understand these fundamentals, you can experiment with different flash techniques that add drama and depth to your photos.
You should also familiarize yourself with the different types of flash setups available. A pop-up flash can offer basic lighting, while an external flash allows for greater control, including bounce lighting, which can soften the effect.
Mastering flash photography requires practice and patience, but it’s a technique that opens up endless creative possibilities. Whether you’re indoors or outdoors, understanding how flash interacts with your subject is key to getting the right look.
Setting Up the Flash for the Best Effect
The placement of your flash is crucial for achieving the influencer flash photography look. You should experiment with different angles to see how light interacts with your subject’s features. Direct flash often creates high contrast, but positioning the flash at a 45-degree angle or using bounce flash can soften the effect.
The distance between the flash and the subject will also influence the intensity of the light. Moving the flash closer to your subject creates more intense lighting, while further distances result in softer light. Finding the right balance between harshness and softness is key to mimicking the influencer style.
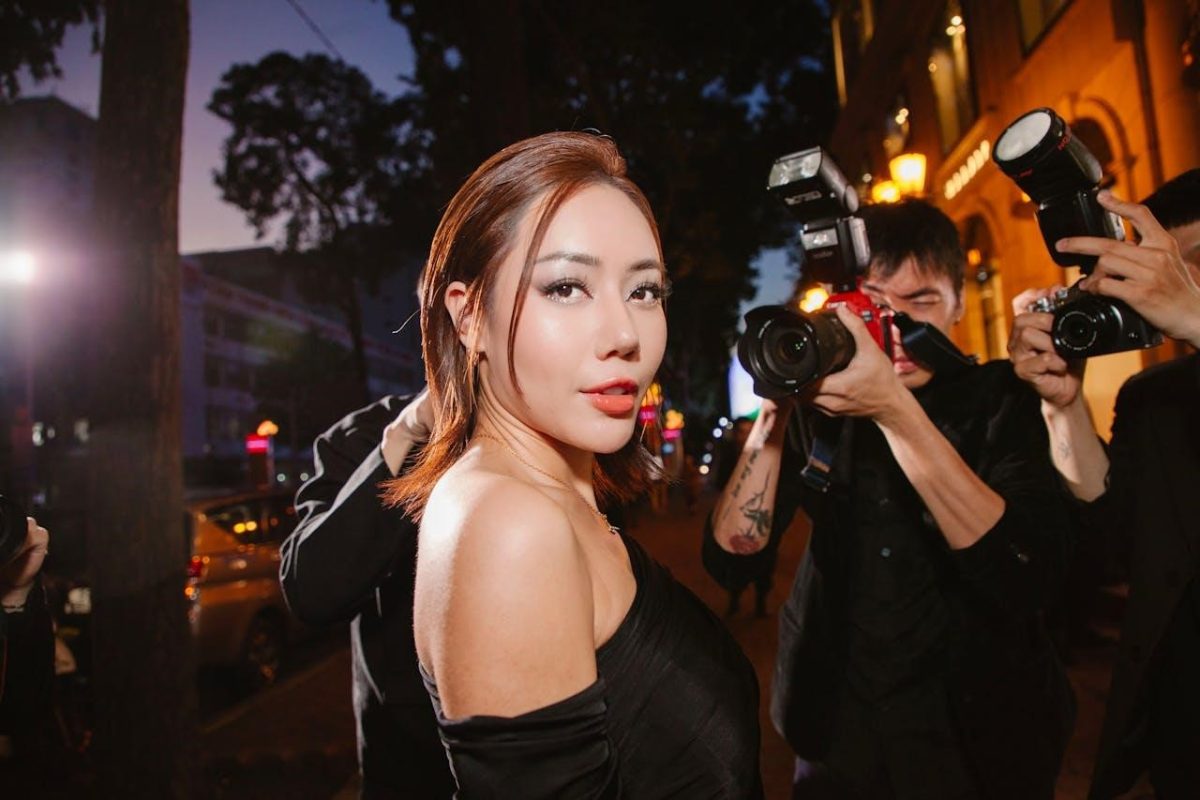
Another important factor is the background. The flash often illuminates the subject, but leaving the background dark adds to the contrast, creating the distinctive look of influencer photos. This contrast allows the subject to stand out while keeping the background blurred and non-distracting.
Experimenting with your flash setup in different lighting conditions can help you achieve the desired effect. Learning how your flash affects your subject will give you more control over your shots, allowing for the iconic high-contrast look that influencers love.
Using Reflectors to Enhance the Flash
To refine the influencer flash photography look, consider using reflectors to bounce light back onto the subject. A simple white or silver reflector can fill in shadows and soften the overall effect of the flash. Reflectors are particularly useful when shooting portraits, as they help illuminate the subject’s face without making the lighting too harsh.
The size and color of the reflector can drastically change the final image. White reflectors produce a softer light, while silver reflectors add more contrast and vibrancy. The key is to position the reflector strategically to direct light where it’s needed most.
A reflector can also be used to prevent harsh shadows that can make a subject look flat or unflattering. By filling in these shadows with reflected light, you create a more balanced exposure, while still maintaining the dramatic contrast that flash photography is known for.
Incorporating a reflector into your setup ensures that you maintain control over how the light interacts with your subject, giving you a more polished and professional result.
Mastering Your Camera Settings for Flash Photography
The settings on your camera are just as important as the flash itself when creating the influencer flash photography look. Start by setting your aperture to a wide setting, like f/2.8, to allow more light into the camera. This will help the subject pop against a blurred background, creating a sense of depth.
Next, adjust your shutter speed. A fast shutter speed can freeze motion, which is ideal if you’re shooting portraits or action shots. However, for a more dramatic effect, slightly slower shutter speeds can introduce a slight motion blur, adding energy to the shot.
ISO also plays a significant role in the overall exposure of your photo. For flash photography, a lower ISO (such as 100 or 200) helps maintain image sharpness while preventing grain. Higher ISO settings can be used when you’re in lower light, but it’s important to balance it with your flash’s intensity.
Finding the right combination of aperture, shutter speed, and ISO is essential for creating the dynamic images that define the influencer flash photography look. These settings ensure that the flash enhances the overall composition rather than overpowering it.
Adding Creative Effects with Post-Processing
Post-processing is an essential part of achieving the influencer flash photography look. After you’ve taken your shot, use editing software like Adobe Lightroom or Photoshop to fine-tune your image. Increasing contrast and adjusting exposure can make your flash-lit subject stand out even more.
One of the most common editing techniques is to boost the saturation slightly, giving the image more life and vibrancy. You can also adjust the shadows and highlights to ensure that the light from your flash is working in harmony with the rest of the image.
Sharpening the details in the subject’s eyes and face can create a more striking effect, ensuring that the focus is where you want it to be. A subtle vignette effect can help darken the edges of the photo, drawing the viewer’s attention to the subject.
Post-processing lets you refine your images, enhancing the lighting effects created by the flash and bringing out the best features of your subject. With these adjustments, you can elevate your photos to the level of professional influencer shots.
Understanding Lighting Ratios for Balance
Achieving the influencer flash photography look requires a balance between your flash and ambient lighting. The key is understanding lighting ratios, which help determine how much light from the flash and the environment should be mixed.
For dramatic effect, use a higher ratio of flash light to ambient light. This will make the subject appear brighter and more defined against a darkened background. However, if you want a more natural look, decrease the flash intensity to allow ambient light to blend more seamlessly with the flash.
In many cases, influencers use a mix of flash and natural light to create a balanced, yet striking, look. Using a flash with subtle ambient lighting in the background ensures that the subject remains the focal point of the image without looking overly artificial.
Experimenting with different lighting ratios will help you master the influencer flash photography style, giving you control over how your subject is lit and how the background interacts with the flash.